

I mentioned in another post that I attempt to scratch built a dungeon interior to go with my newly acquired Bones miniatures. Yesterday I had a nice idea how to get away from boring wall segments and make the dungeon more appealing to the eye.
As I am painting a dwarven warrior at the moment I thought about where they would store their beer and naturally a dark place like a dungeon would be well suited for this purpose.
Well, I guess I am more thinking of Moria where all of the Dwarves are already dead and only remnants of life are still visible. The plan is thus to have a wall segment that also resembles a wine or beer storage, complete with oaken barrels.
I own the Hirst Arts Cavern accessory Mold (Nr. 85) which conveniently allows to cast half of a barrel with a wooden support structure. While Hirst Arts molds are not cheap (34$ for one) they pay off if one goes for a more ambitious project were a lot of architectural elements/accessories are needed. I can only recommend the mold I own, as it gives you all you need for some good dungeon crawling: Treasure piles, chests, crates, big and small barrels, levers, torches, wall adornments, crystals, buckets etc.
I use Hydrocal to cast the pieces and they come out durable and with minimal casting artefacts. For the wall segment I used to carve the structure into styrofoam. While that worked well for simple brick walls, with the circular alcoves I planed to put the barrels in, it just turned out messy. I decided to try out some new material I just recently bought a block of: Original Sculpey (20 $ NZ for 454 g).

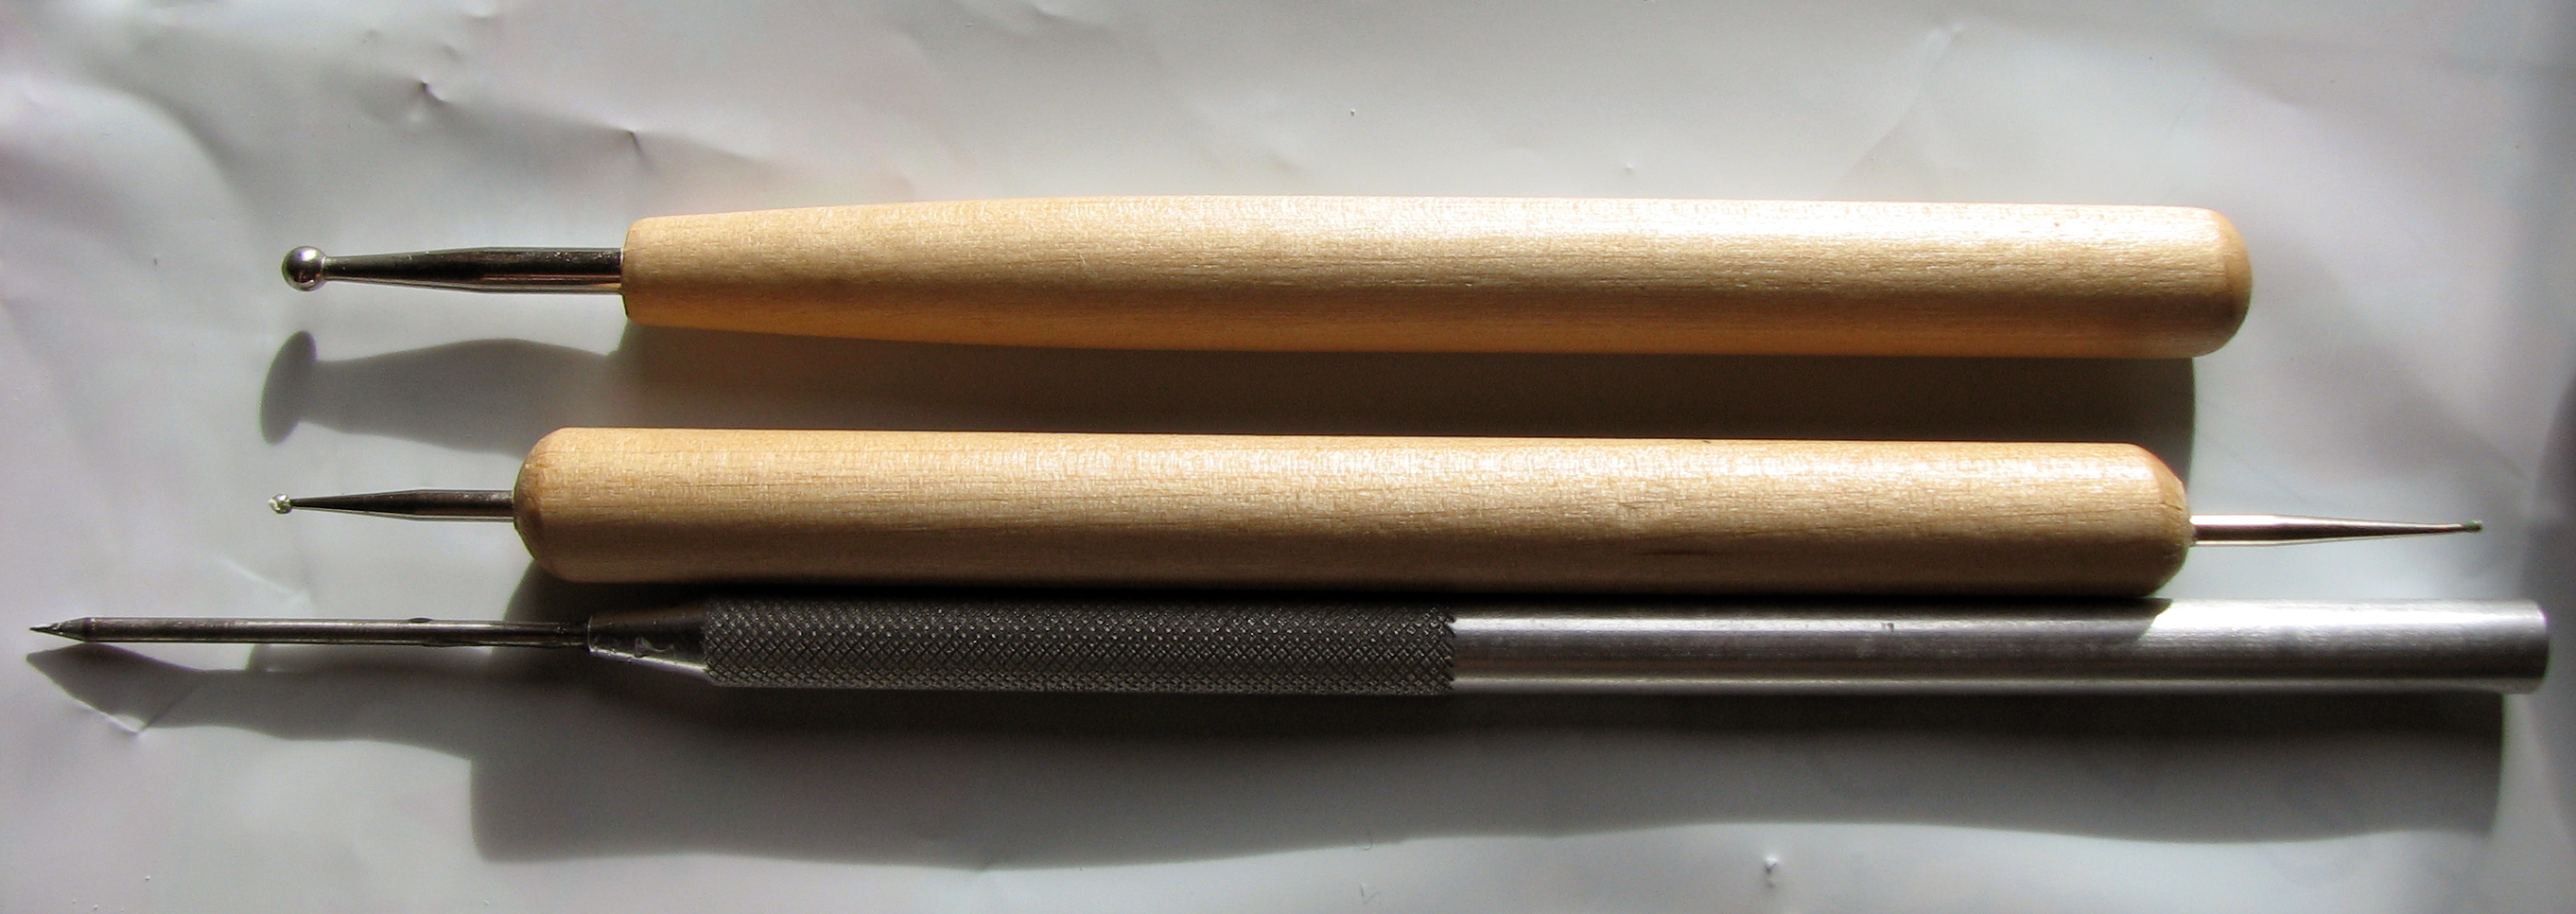
To form the clay one also needs some sculpting tools. I got a selection of tools from a shop (Botany Pottery Studio) that sells sculpting supplies (for people in New Zealand it is close to Botany shopping centre at Bishop Dunn place in Auckland)
I took a bit of clay (I think I could at least make 20 wall segments, each 20cm x 6cm out of the block) and rolled it out on a sturdy plastic bag. I aimed for around 5mm thickness, so that I can later glue it on a piece of styrofoam to save clay and weight. Surprisingly it did not stick much, but I guess a piece of glass would be much better, as you can directly transfer it into the oven on it.
After I traced the size of the wall segment I started carving the brick pattern. I already encountered a small problem with the Sculpey: It is very soft and tends to drag a bit. I guess it is a matter of practise and given you can always go back and smooth out your sculpt it is not a big deal.


I transferred the finished wall to a metal sheet and followed the baking instructions. 15min turned out to be a bit short and I ended up baking it for 30 minutes. After baking the Sculpey remained slightly flexible and has a rubbery feel to it. I would wonder if that is how Original Sculpey turns out after baking or if I did not bake it long enough? Maybe someone who reads this can provide some insight.
However, I proceeded with painting the piece and encountered no problems. The material takes acrylic paint well and keeps its shape. I was even able to slightly sand the piece. I started with a dark grey with a bit of brown mixed in (I use cheap acrylic wall paint for terrain building. At Placemakers or Mitre 10 they can mix pretty much any colour and 260ml cost about 8 $ NZ) and then drybrushed three times with gradually lighter shades.


Finally I applied a mixture of matt varnish, brown pigment and water (about 4 brush loads of varnish, one brush load of water and two small brush loads (size 0) of pigment) . This basically takes away any sheen and also provides some definition for the cracks and lines.

It took quite some time, but in the end I think it was worth it. In comparison to a wall made entirely out of styrofoam I would say the Sculpey provides much more definition and crisper lines, but judge for yourselves.

So far, so good. Now I have to finish painting the barrels, cast two more and glue the segment on a piece of styrofoam.

If you would like a constantly updated, themed PDF terrain building, painting and roleplaying guide consider supporting me on Patreon. There also other choice rewards for supporters.
![]()
If you are not keen on Patreon, but enjoy my content and would like to see me well caffeinated so that I can publish tutorials, reviews and guides more frequently click below and buy me cup of dark, mellow goodness.
![]()

Wel done 🙂
LikeLike
Thank you for your comment. The Dungeon project is quite fun, but surely not as complex as your graveyard one.
LikeLike